If the settings icon does not appear here, you can instead type "settings" in the search bar and open the application that way.
#### 3. In the menu on the left, click on the "Bluetooth and Device" option. 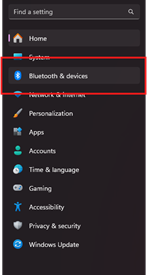 #### 4. In the new menu that appears on the right of the screen, click the "Printers & Scanners" option. 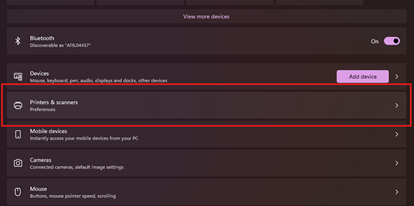 #### 5. Click on the "Add Device" button located at the top of the list. 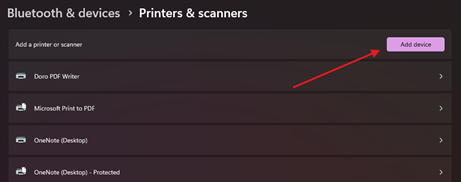 #### 6. Find the printer you want to set up by using the printer ID in its name.The printer ID is labeled on the physical printer
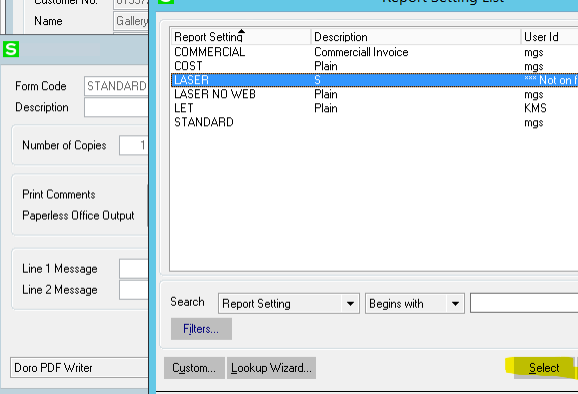
#### 7. Press the add device button to the right of your desired line. 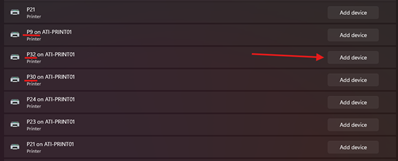 #### 8. The printer will begin setting up automatically. Once completed it can be used as normal. --- ## 🧠 Additional Notes & FAQ --- > **📅 Last reviewed:** `2025-09-22` > **Author:** `Tanner Bench` > **Related Tags:** `How-To:` # How To: Add a Printer for Invoice Printing in SAGE > **📘 Purpose** > This guide walks through adding a printer in SAGE for printing invoices. --- ## 🛠️ Prerequisites - [ ] Connected to LETRemote Desktop --- ## 🔁 Step-by-Step Instructions #### 1. On the start screen of the LETRemote Desktop, click the Control Panel #### 2. If the "View by:" setting is "Category", look under "Hardware", and click on, "Add a device" #### 3. A "Add a device" window will pop-up and load the available printers represented by an icon to add to your computer #### 4. Select the printer you want to add by double-clicking on it #### 5. Another window will open and run some commands to add your selected printer to your computer #### 6. Sign out of SAGE, then input the invoice number you want to print in the "Invoice No." field, then click the printer icon next to the grey "ok" button 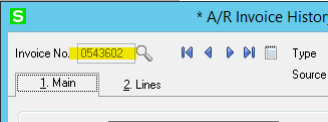 #### 7. In the "Form Code" field of the "Invoice History Printing" window that pops up, make sure the selection is: "LASER"If necessary, click the magnifying glass icon to find "LASER" and "Select" it.
 #### 8. Change the "Paperless Office Output" option to "Print All" 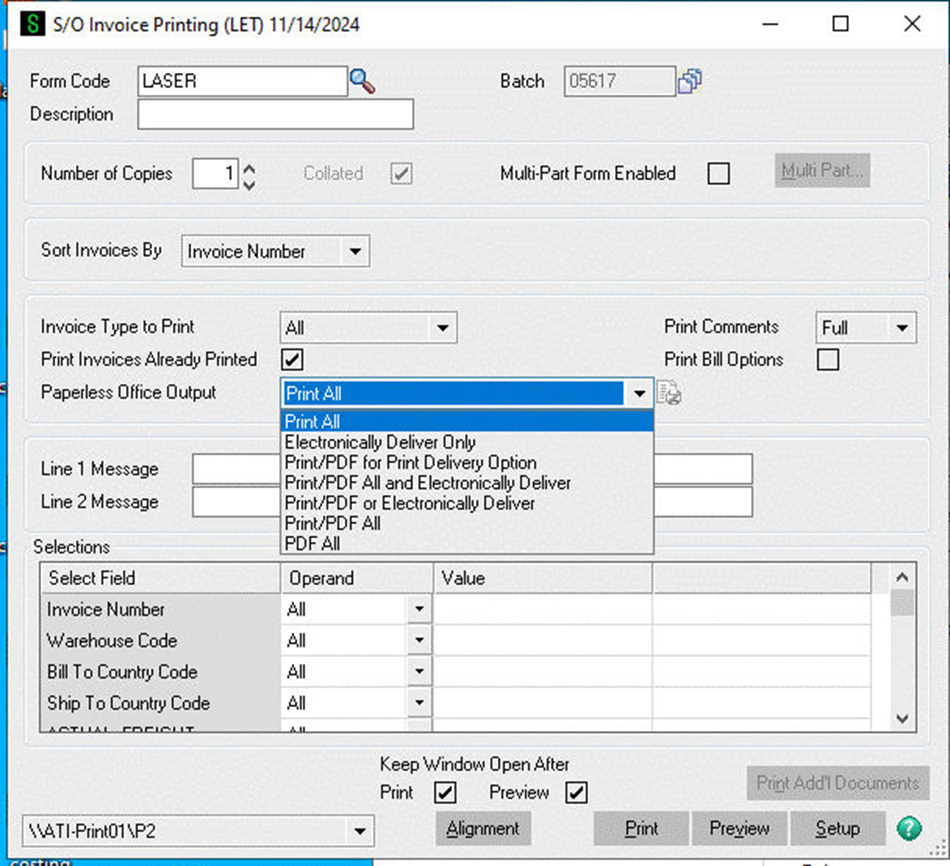 #### 9. In the bottom-center, click the drop-down menu black triangle and click on the newly added printer to print your selected invoice, then click "Print" 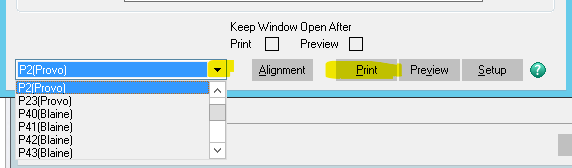Retrieve your printed invoice from the physical printer that was newly added to your computer!
--- ## 🧹 Cleanup (if applicable) - [ ] Ensure to retrieve your newly printed invoice --- ## 🧠 Additional Notes & FAQ --- > **📅 Last reviewed:** `2025-09-22` > **Author:** `Tanner Bench` > **Related Tags:** `How-To:` # How To: Change the Default Printer in SAGE > **📘 Purpose** > This guide walks through how to change the default printer in SAGE. --- ## 🛠️ Prerequisites - [ ] Be connected to LETRemote --- ## 🔁 Step-by-Step Instructions #### 1. While in LETRemote, Click on the Windows icon in the bottom left corner 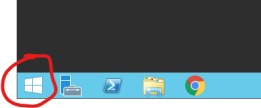 #### 2. Click on Control Panel 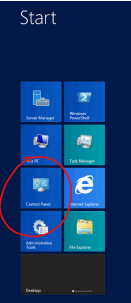 #### 3. Click on View Printers and Devices 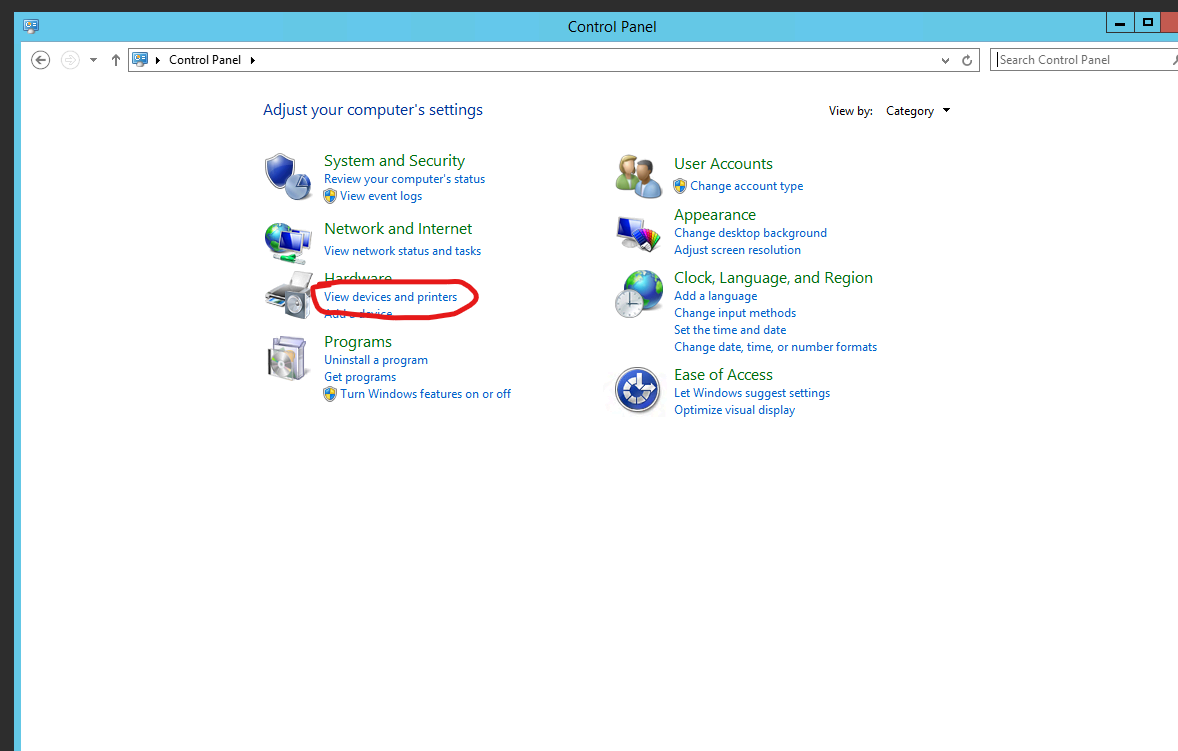 #### 4. Choose Doro PDF Writer as your default printer  --- ## 🧠 Additional Notes & FAQ --- > **📅 Last reviewed:** `2025-09-22` > **Author:** `Tanner Bench` > **Related Tags:** `How-To:` # How To: Clear print queue on Zebra printers > **📘 Purpose** > This guide walks through the process of clearing print queues on Zebra Printers --- ## 🔁 Step-by-Step Instructions #### 1. Leave the Zebra printer on and running.It will keep printing, and the status light will be solid red or flashing red.
#### 2. Press and hold the blue button on the top of the Zebra printer for ~5-10 seconds until the status light flashes, then release.  #### 3. Ensure the light on the Zebra turns to solid green. The printer is ready to print again!The solid green status light indicates the print queue was cleared and is ready to be used again.
## ✅ Validation - [ ] **Ensure the status light turns to solid green** --- ## 🧹 Cleanup (if applicable) - [ ] Trash unneeded excess prints --- ## 🧠 Additional Notes & FAQ --- > **📅 Last reviewed:** `2025-09-22` > **Author:** `Tanner Bench` > **Related Tags:** `How-To:`