# Starship
These are the pages to follow to setup a user in Starship
1. Create connector
2. Setup Printers
3. Setup Print profile
# Starship Cloud - User Connector Config
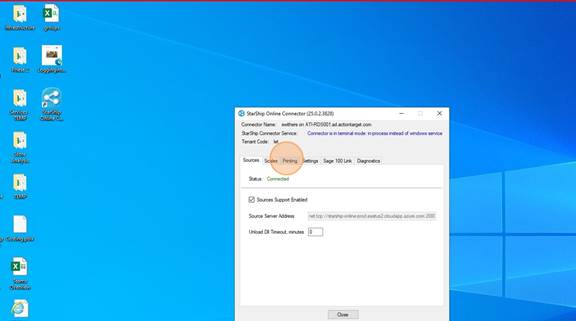
1. Double-click on "Starship Online Connector"
2. Click on the "Printing" tab
3. Click on "Configure"
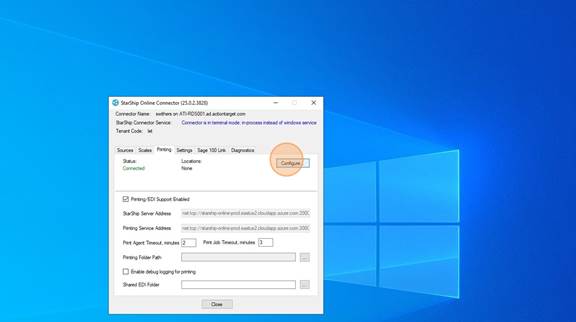
4. Choose the location (s) where the User will be shipping from. You can choose multiple locations.

5. Click "OK"
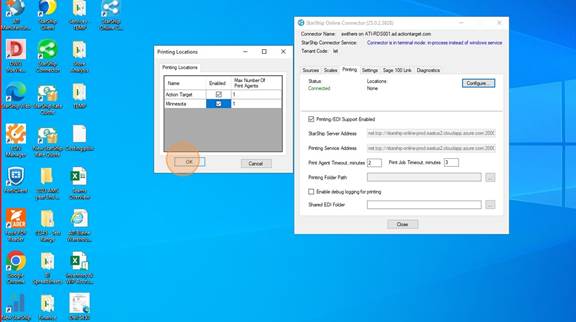
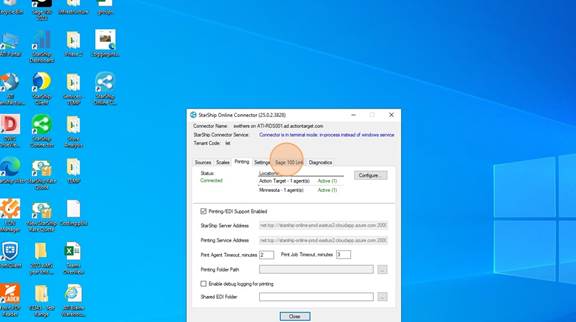
6. Click on "Save and Restart". Then wait until the Staus shows Connected and the location(s) are in there with Active next to them.
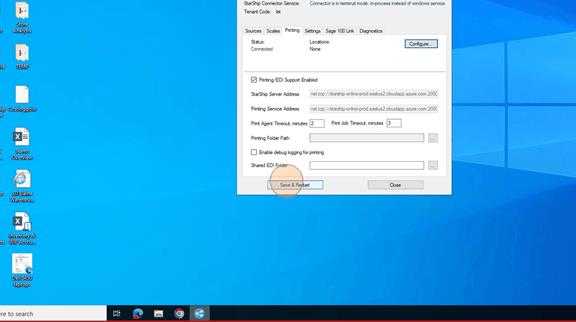
7. Once it looks like below with the location(s) and the Active showing, you are done here. DO NOT CLOSE the Connector. This MUST STAY OPEN while you are using Starship Cloud. It can be minimized.
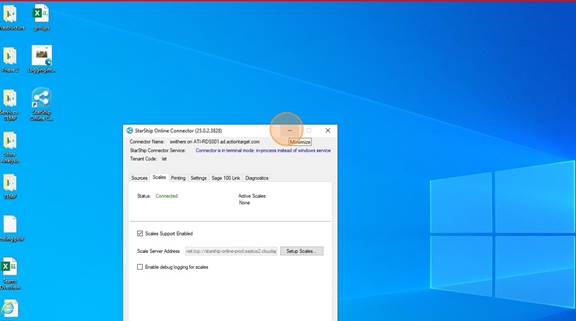
8. MINIMIZE the window
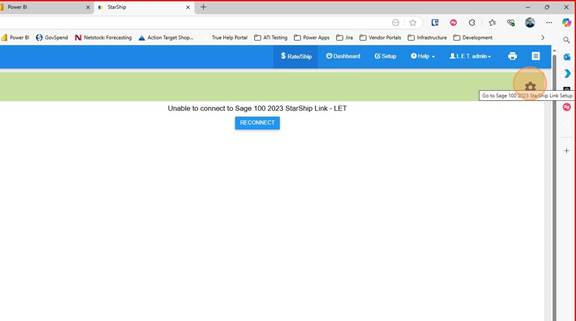
9. Open a browser
10. Type in "let.starship.online" and go to the page
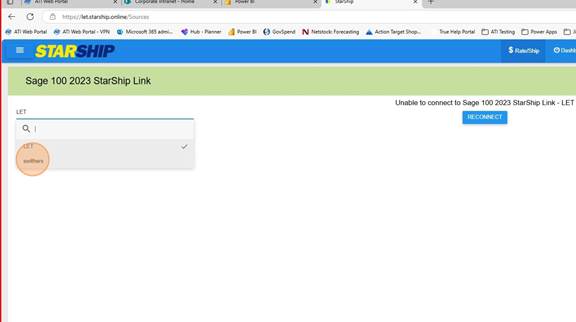
Log in with your Starship Cloud Username and Password. This should have been emailed to you.

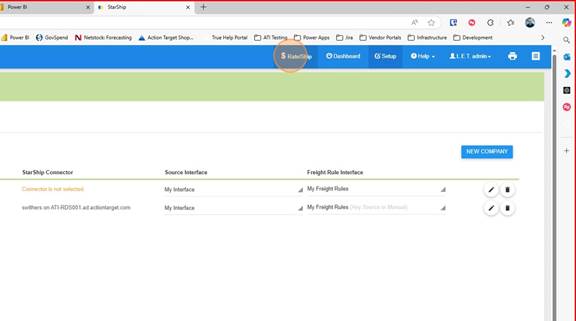
11. Click on the Gear icon
12. Click "New Company"
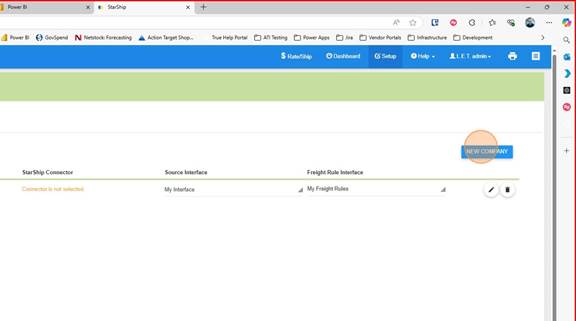
13. Choose the connector you just created.
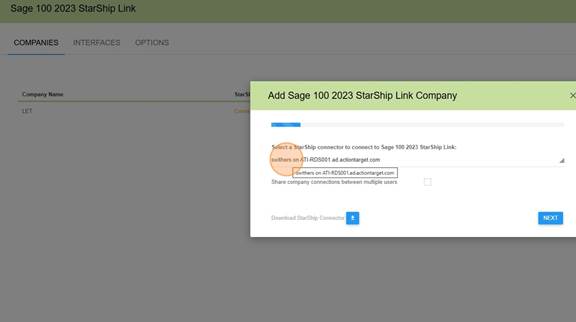
14. Click "Next"
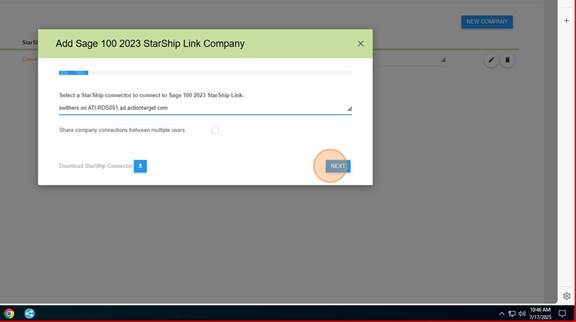
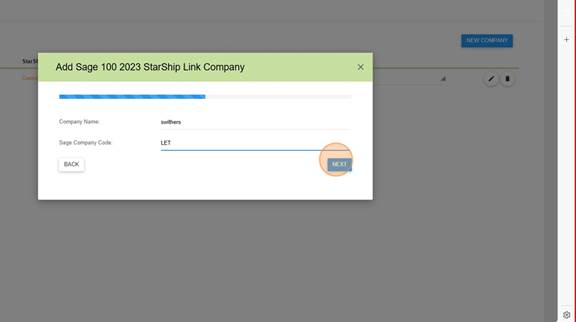
15. For Company Name - Your Username (the example below is swithers)
For Sage Company Code - LET
Click on "Next"
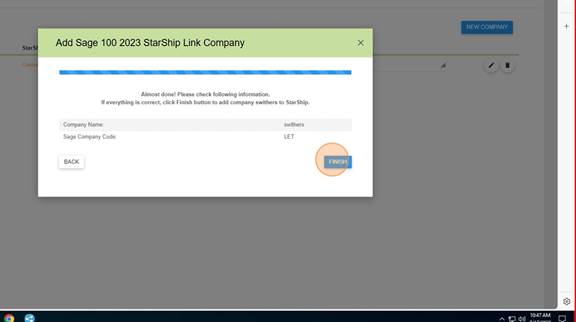
16. Click "Finish"
# Starship - User Setup Printers
Follow these steps to setup the Printers for the user. Typically 2 printers are needed:
- Laser Printer
- Lable Printer
##### **The Starship Online Connector on your desktop must be setup and running on your desktop before you can do any of these steps.**
[](https://wiki.actiontarget.com/uploads/images/gallery/2025-09/GQXimage.png)
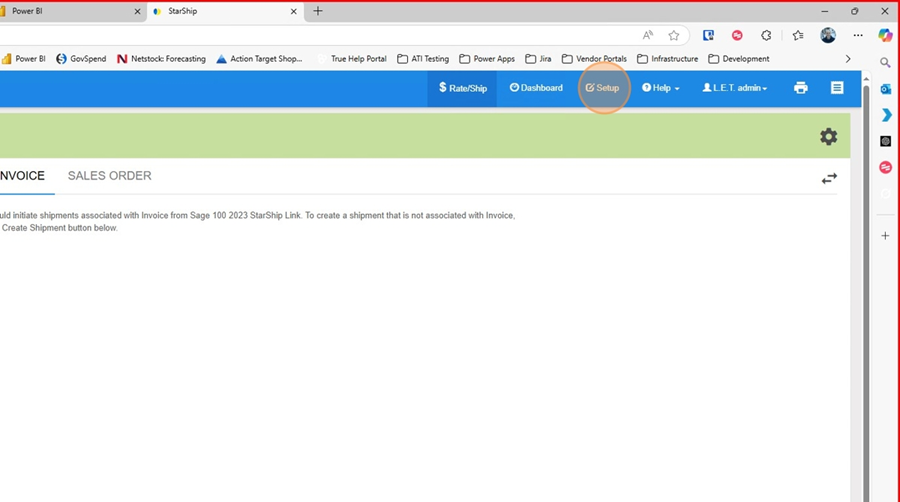
1\. Click on "Rate/Ship"
2. Choose the user connector
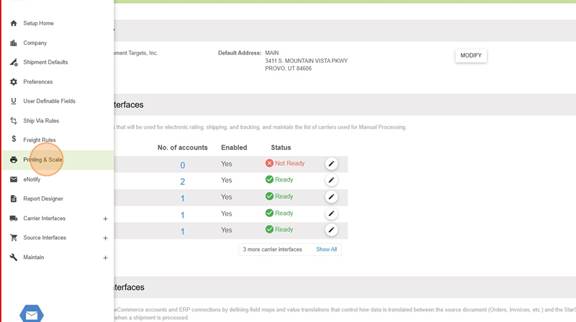
3. Click on Setup

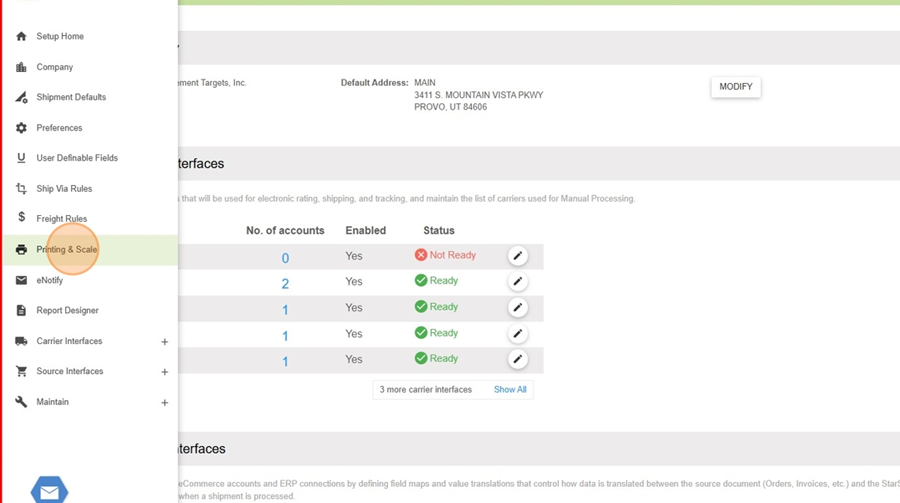
4. Click on "Printing and Scale"
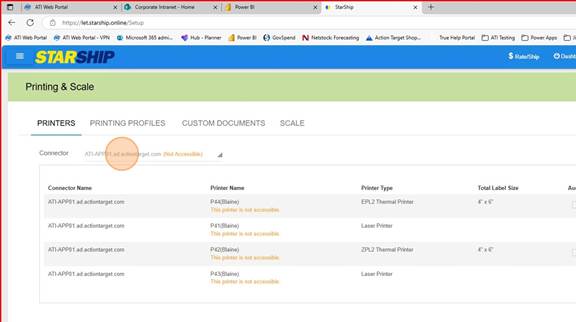
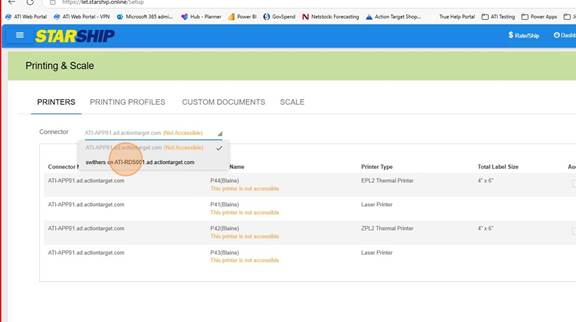
5. Under Printers choose the Connector you want to add printers to
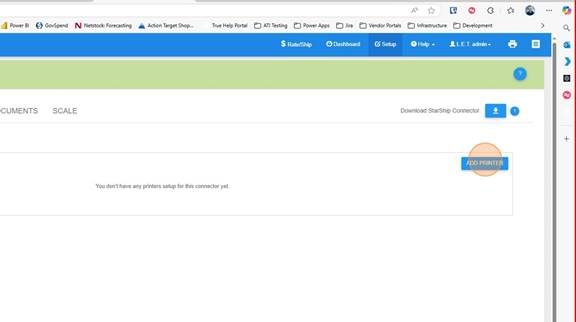
7. Click on "Add Printer"
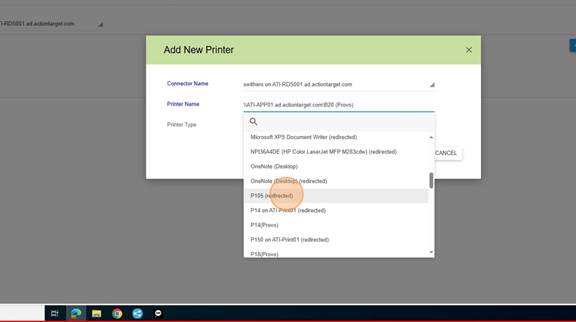
8. Select the Printer to add
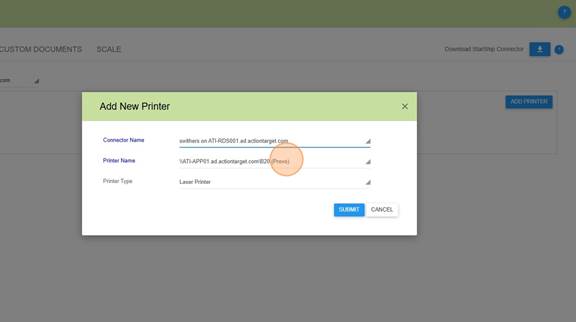
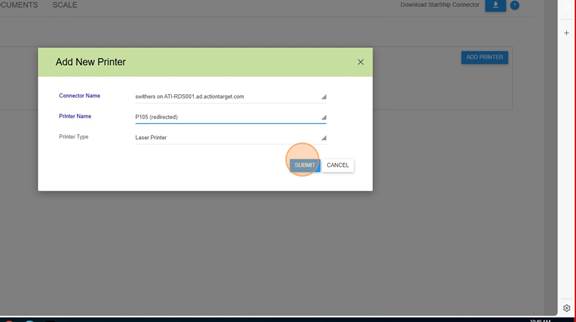
10. Click Submit
11. Continue until all of the Printers the user will be using are added.
# Starship Cloud - User Print Profile
##### **The Starship Online Connector on your desktop must be setup and running on your desktop before you can do any of these steps.**
[](https://wiki.actiontarget.com/uploads/images/gallery/2025-09/GQXimage.png)
Printing Profiles are used to print the correct labels and paperwork for each of the different Shipping companies that we use. In Blaine, there are 2 main profiles, one for Truck lines and one for Parcel shipments, although each station can ship both.
For purposes today, we are going to Copy the profile
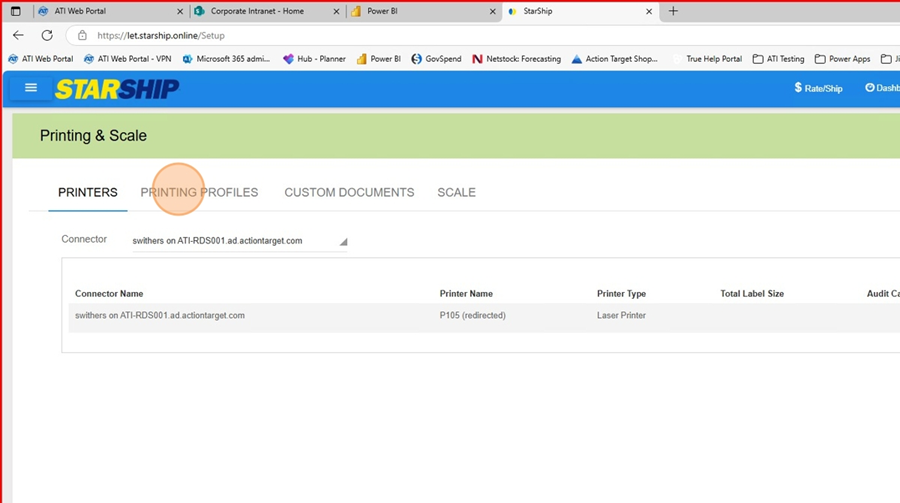
1. In Starship Cloud click on Setup
[](https://wiki.actiontarget.com/uploads/images/gallery/2025-09/7Seimage.png)
2\. Click on "Printing and Scale"
[](https://wiki.actiontarget.com/uploads/images/gallery/2025-09/6NAimage.png)
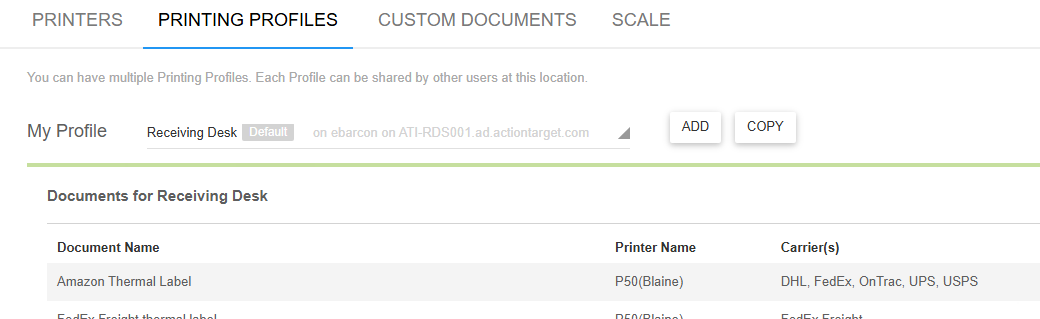
3\. Click on "Printing Profiles"
[](https://wiki.actiontarget.com/uploads/images/gallery/2025-09/N9Iimage.png)
4\. Click on the Printing Profile you want to copy and then click on "Copy"
[](https://wiki.actiontarget.com/uploads/images/gallery/2025-09/us1image.png)
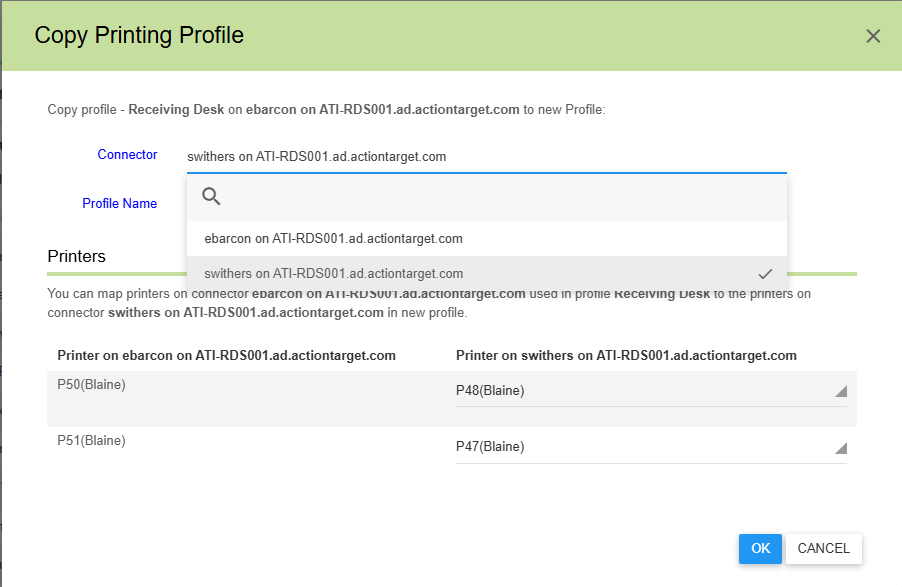
5\. Choose the connector that you want to create the profile for
[](https://wiki.actiontarget.com/uploads/images/gallery/2025-09/QJuimage.png)
6\. Name the Profile and choose the printer you want to copy of the user.
[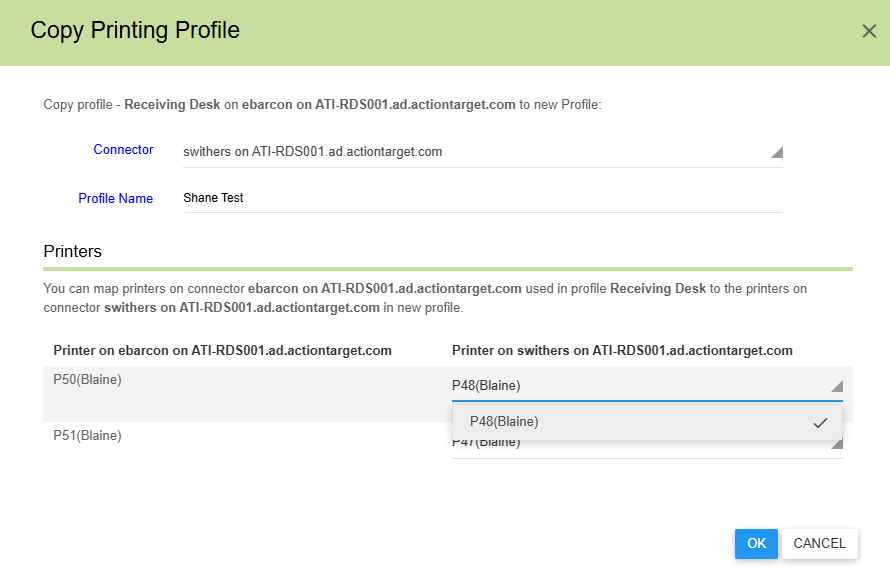](https://wiki.actiontarget.com/uploads/images/gallery/2025-09/LkUimage.png)
7\. Click OK and then you are done.
[](https://wiki.actiontarget.com/uploads/images/gallery/2025-09/V4Jimage.png)