Setting up and using the 3CX Web Client
📘 Purpose
This guide walks through signing into the 3CX Web Client. It also provides additional steps to make calls on your desk phone and mobile app.
🛠️ Prerequisites
- Navigate to 3CX Web Client
🔁 Step-by-Step Instructions
1. Browse to the 3CX Web Client
2. Click the "Microsoft" button to sign in to your extension
Ensure you are signing into your ATI Office 365 account otherwise you will not be signed into the ATI 3CX web interface
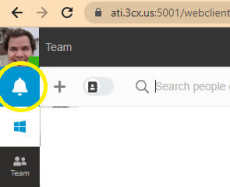
3. Once logged in, the webpage will need permissions so it can work properly
A) Click the picture of the white bell surrounded by the blue on the left side of the page
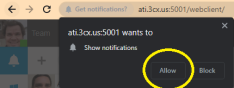
B) Click "Allow" on the small prompt window
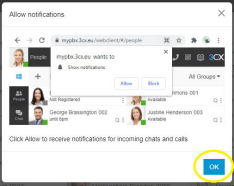
C) Click "Ok" on the prompt behind the show notification box
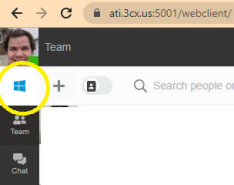
D) Click the windows flag icon on the left side of the page
Some browsers replace this with either a Chrome or Edge symbol. The function of the button is the same.
E) Click "Install" on the "Web App (PWA)" side
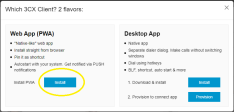
F) Confirm by clicking "Install" on the small prompt near the top right corner of the page
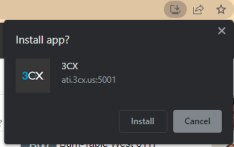
A new small window will open, and the browser will close. This is supposed to happen!
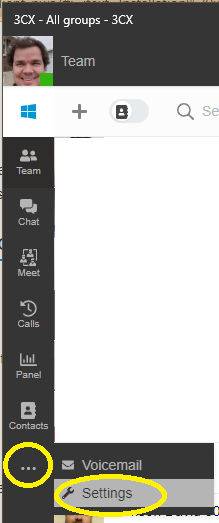
G) In the new small app window, click the three dots on the left hand, then select settings
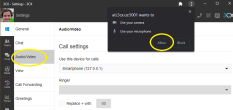
H) Choose "Audio/Video" in the sub-menu on the left.
The browser will ask for your permission to access your camera and microphone. Click "Allow"
Your extension is now setup on your computer!
4. (Optional) Set up desk phone and mobile app calls
A) In the 3CX app, click on the picture of a handset near the top right corner.
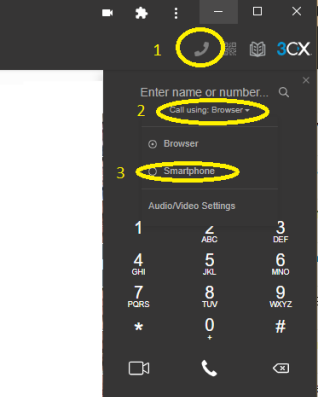
B) Click "Call Using: Browser"
C) Select "Smartphone"
The web client will now make calls on your desktop phone and mobile app.
If you want to switch back to using the Chrome/Edge app to make your calls, follow the step above and on step C change it back to browser.
🧠 Additional Notes & FAQ
📅 Last reviewed:
2025-09-22
Author:Tanner Bench
Related Tags:How-To:
No Comments